Illustration Goals for 2019

I’m not usually the type to make New Year’s resolutions but as I enter the second year of being an illustrator it seemed necessary to set some illustration goals for 2019. They always say that you need a good plan as a starting point of any business and it occurs to me that although I have a secret perversion for graphs and spreadsheets I haven’t actually set myself any goals. I’m a Fundraising Events Organiser by trade and so there’s a lot of skills I have brought with me to illustrating. I keep detailed records, I’m a good budgeter, I’ve got tonnes of marketing experience and I am very well organised. But now it’s beginning to feel that this is the only reason I have gotten as far as I have up to now without a business plan.


But, what even are my goals?


This turned out to be a surprisingly difficult question. I know what I ultimately want and that’s to be financially able to increase my range of products. I also want to successfully gain more commission work. The difficult part is working out the next steps to that that I can achieve and measure in the next year. That’s right babes we are talking about SMART goals.


I like big goals and I cannot lie


I can’t quite work out if it’s a good or a bad thing that I achieved one of my goals by the end of 2018.  The goal was to get 100 likes on an organic reach post on instagram. After Stephen Hillenburg died I posted a Spongebob sketch tribute to him which did exactly that. Does this mean that my goals are too easy? I’d like to think that it means that I have a range of goal levels for the next year. Think about it like a video game where you can choose your difficulty level. When you are playing in expert it can be disheartening if you keep losing. Sometimes you need to conquer normal mode first. I think that I’ve taken this same approach with my goals setting. Some are easier than others, some I might not achieve. At least I will have tried though!


The goals


  • Get 1200 followers on instagram
  • Have products stocked in 2 stockists
  • Increase to 100 sales on Etsy
  • Have a stall at a niche market
  • Get 20 reviews on etsy
  • Increase etsy product number to 50
  • Invest in a new type of product
  • Secure a large paid commission


These might all seem piddley and small to some people but it fits me. I have to remember the resource I have available in terms of time and energy as well as capital. The goals focus on growing what I am doing currently aswell as investing in new areas. Another goal is to continue this weekly blog for the next year. I look forward to updating you all about how I’ve done in December 2019 🙂


Have an amazing new year and good luck with your goals and resolutions too!


Last Christmas, I gave you my Art

It’s my illustration birthday!

At Christmas time 2017 I accepted my first commission. I didn’t have a plan to become an illustrator at the time. As I come up to my first year I have been reflecting on the last twelve months. I want to share what I have learnt and my reflections with you.

This week, my focus will be on my first Christmas season as seller. This has been my busiest time of the year as you might expect. I was surprised to find that it seemed to start as early as October. This was when my first commission for Christmas came in. I also found that, in line with recent shopping trends, bespoke presents are in demand at Christmas time. Over the Christmas period I have been commissioned to produce the most house portraits in a similar given time window, with a total of 3 requested before December had even begun.

One of a kind presents for one of a kind people

The number of commissions I could take on and window I could create them in was always something never very far from my mind. Consequently I chose quite a conservative window of stopping taking Christmas commissions on 8th December. This meant that customers didn’t have to be a super early bird to get one, but that I absolutely knew I was able to deliver all of the commissions on time. Especially in the context of increased ‘off the shelf’ Etsy orders and markets.

I also created a range of ceramic christmas tree ornaments and generally got my stall in the Christmas spirit. You may have spotted me in Christmas jumpers on a couple of occasions recently! As for the Fair’s I chose I attended 4 between October and December. There are a lot to choose from and I wouldn’t return to all the ones I did this year. However, each one is a valuable learning experience. Plus, there is always chance to chat to other stallholders about the world of craft and illustration when a fair is quiet.

The most wonderful time of the year

The best thing I have learnt is that I see myself doing this next year. I didn’t have any horrible experiences, where everyone’s stall is flocked around except mine. I did have occasions where I forgot important items, like carrier bags or my display stands, but there’s nothing that was a true crisis. Even the day where I didn’t make back my stall fee (unfortunately there was one) serve to help me decide which stalls to approach in future.

If you came to see me at any of my markets this year, or visited my Etsy store, supported me on social media I’d like to say a big

THANKYOU!

Year one has been brilliant and I have lots of ideas for year two 🙂

Merry Christmas, Friends!

Techniques for Illustrating Ceramics: 3. Sgraffito

Sgraffito is a technique by which a design is carved through a layer, revealing the layer beneath. The name derives from the Italian word ‘graffiare’ which means ‘to scratch’. I find it is a time consuming technique but can herald some impressive results.


Preperation


As the definition suggests, you need to ensure that you have contrasting layers of colour on your piece before applying this technique. I colour greenware clay with coloured slip which I carve when it is leatherhard. The nature of ceramics is that it is inherently unpredictable, so committing the time required to sgraffito a detailed piece can be risky. This is why I have stuck to colouring with methods that are typically more reliable. Coloured slip allows me to be confident that my piece has the best chance of survival when needing to be coloured at the greenware stage.


Tools


You can use a range of tools in sgraffito. There are even tools on the market specifically for sgraffito use. Oddly though, I don’t like using them. I do have a specialist sgraffito tool. It has a range of sharp edges suited to creating different widths and styles. However, it’s missing that ‘pencil style’ that I always look for in tools.


As an illustrator and life long drawerer I have a tendency to prefer tools that you operate like a pencil. This is because I know I will create my best designs as this is how my hands are used to working. It is for this reason that my sgraffito tools of choice are dental tools. They are sharp, precise and can create a range of textures. Best of all they have that pencil resemblence that works best for me.


Technique


An important thing to master in sgraffito is the pressure you use.  If you master this steadiness of hand you can apply the technique on top of several layers of colour and by altering your pressure reveal different colours throughout the piece.


Top Tip


The benefit I find of sgraffito is that through carving you can create a controlled and precise design. However, it is important to remember that glaze application dulls detail, so don’t spend time on details that will be lost when the piece is final fired.


Introducing My Studio

As a kid I would have loved to have a studio space. I probably wouldn’t have believed you if you told me that one day I’d have access to two studios to work in, but luckily for me I do. Surprisingly though, as an adult, it’s often difficult for me to convince myself to spend time in them. I believe that it’s a symptom of having two jobs. My leisure time is rarely just that, and so I am painfully guilty of working in front of the telly.


The problem here is that my living room ends up filled with paper, pens, sewing kit, fabrics, clocks to illustrate, prints to post… you get the picture. It means I never get away from work, and it’s not much fun do the rest of the household too.


So I have been working on turning my home studio space into a magnet to draw me into a dedicated workable space. I am happy to say I’ve done this successfully through focusing on several aspects of the studio.


How to create an ideal studio space

1. Keep it organised

Firstly, I took the time to ensure the space is used effectively, efficiently and permanently. By this I mean that there is a home for everything, positioned in order to improve workflow and for maximum ease of access. This is something you’re never going to achieve if your base is a pile on the living room coffee table.

2. Immerse Yourself

Secondly I made the space my own. I filled it with the tools I used to create and decorated it with the pieces that inspire me. This includes pieces by my favourite artists and pieces of my own that I am proud of. In this respect there is still a long way to go, and lots of wall space left to fill, before I am happy I have my stamp on the room. It is important to have somewhere you can immerse yourself in your work.

3. Lights, Camera, Action

Thirdly, I made sure my studio has the one thing most important to any studio space, a good source if daylight. It’s essential for your wellbeing, your eyesight, your Instagram photos and viewing your work as it truthfully is.


As my studio changes I will share updates via my blog, and keep your eye out for a future post on an insight into my ceramic studio.


Machine wool in the studio

Techniques for Illustrating Ceramics: 2. Coloured Slips

Coloured slips can create consistent colours on your ceramics. Slip is clay with a high moisture content and as a result is paste like or liquid. Coloured slips add colour to ceramics through the addition of pigments or oxides to slip.

Application

You can apply coloured slip in several ways. Namely, paint it directly on, pour it on or dip the piece in the slip. You will probably need to add several layers of slip to your piece to create a consistent colour. You can able to tell if this is the case if you can see the original colour of the clay through the slip. If you need to add another layer of coloured slip you can do this when the clay is still wet but has lost it’s glossy shine.

Painting

Preserving minute details can be difficult if you need to apply several layers of slip. Therefore I wouldn’t necessarily recommend this method of colouring if you intend to paint intricate details in your work. Unless, of course, that you are trying to achieve a faintly painted line.

Dipping and Pouring

I have found that dipping the piece or pouring slip onto the piece often means that you don’t have to add as many layers. One dip is often enough for a piece to be completely coloured to a desirable thickness. However, the drawback of this is again the difficulty to control the slip. Consequently it’s really only useful for block colouring entire pieces or sections of a piece.

As slip consists of clay it is only able to be used at the greenware stage of the piece. I have found that it is a good way to create a bright and strong base colour to use underglazes on top of.

Top tip

Remember always to test any colours you use before adding them to your final piece. When using a mixture of glazes, underglazes and slips especially it is difficult to predict what the final result will look like. Ceramic colours, whatever they are made from, will look very different before they are fired. My top tip is not to risk your piece and to create small shards or tiles on clay to text your concoctions on first.

If you have nay specific questions on the use of coloured slips, get in touch!

Winter is Coming…

In the world of independent creative businesses Christmas is, unsurprisingly, the busiest time of the year. It’s a season geared towards spending and artists around the world are here to make sure that you have something unique, ethically sourced and individual to give to your loved ones. Each sale is appreciated, and although of course I am biased I would recommend that everyone make an effort to support small traders and support local businesses in their christmas shopping this year. In this post I want to talk about the perks and perils of the season and introduce some tips for coping with the most wonderfully manic time of the year.

Are you prepared?

For me, enquiries for bespoke christmas gifts started coming in in October. Just about the time I started on making a batch of a brand new product, ceramic Christmas decorations with a distinct “This Is Sian Ellis” vibe (more on those soon!). It was also when I started on my first fair appearances of the season and have begun to organise the two day extravaganza which is the Whirlow Hall Farm Christmas Fayre, which I will not just be running but exhibiting a stall at too (and I did the poster artwork, in for a penny, in for a pound!).

There’s a lot of pressure that comes for a small business at Christmas, fuelled not just by the frantic marketing of other businesses around us but by the knell of a quiet January (seriously, who makes any money in January?).

As this is my first Christmas as a trader I know I need to take it slowly. I haven’t approached any stockists this year, for example, and I have limited my fair appearances to 4 fairs over 5 days. I have not just a lot to learn, but a lot to do, in both of my jobs. Rather than rush into a Christmas unprepared and stressed I have taken the decision to spend that quiet January in preparation, including for Christmas 2019.

What I would advise is that all sellers, whether you are full time or part time, remember to take stock of their energy levels and general sanity this Christmas season too. Of course we are all grateful for a busy Christmas, and it’s what we dream of when we set up our businesses, but it shouldn’t reduce us to crumbled husks by the time it’s through.

Steps to a stress free traders Christmas

1) Are you still accepting commissions?

Do you need to be? Keep an eye on your work loads, commissions are the most time consuming of all and if you have enough lined up for the Christmas season and need to focus on selling your products perhaps this is something you can keep an eye on as to when your workload gets to a point you need to put this on hold.

2) Ask around.

There are a lot of markets and Christmas Fairs and so many are on conflicting dates, plus you need to make sure you have time for all the parts of your business that aren’t sales too. Try to make sure that you exhibit at the absolute best ones for you and your produce, find out from other makers about their experiences with fairs you are unfamiliar with. A day at a dud fair can be time and money that you can’t afford to lose this time of year.

3) What are your January plans?

What can you be doing in your quiet months to prepare for this time of year? Can you work on your Christmas 2019 stock, your look book? How about in the months running up to your busiest period try and encourage or incentivise your fans to approach you for Christmas commissions early.

Whatever you choose to do, I hope you have a great Christmas season 2018!


Techniques for Illustrating Ceramics: 1. Underglazing

Introducing ceramics

For the last couple of years I have been practicing ceramics. I took a course in handbuilding and later one in the use of coloured slips. Alongside this I’ve dedicated time to practiciing and exploring ceramic forms and decoration. Throughout this blog I’ll share tips and tricks I have learnt beginning with a focus on surface design.

I have also created a glossary page with definitions of more specialist words I’ll be using to describe illustration and ceramic techniques. As with most things, they tend to be easy enough to learn once you break through the smoke and mirrors that is the associated vocabulary. Nevertheless I will try to keep this all as jargon free as possible.

My ceramics and illustration have always gone hand in hand and it is not uncommon for me to spend more time on the surface design of a piece than on it’s initial build. This is quite the feat as a handbuilder as building pots through slab, coil and pinch pot techniques is generally more time consuming than their wheel built counterparts. As such it makes sense to me on this blog to explore first different techniques in illustrating and colouring ceramic pieces.

The use of underglazes

The first technique I’m looking at is underglazing. Here I ‘m referring specifically to commercial underglazes that can be applied to greenware or bisque fired pieces before they are glazed. Underglazes work largely like paint. The colour that you see when you paint is then dramatized through the addition of glaze and the final firing process but they are very simple to paint directly onto bisque fired clay.

I’ve also had success with these underglazes on pieces that I haven’t glazed. However, I ‘ve found that the underglazes produced by my studio are quite volatile to use on greenware, often resulting in bubbled or raised results after the final fire. Ultimately the trick to using underglazes is practicing using the right amount as using too little can result in a blotchy finished piece and too much can bubble or run.

If you have any more specific questions on the use of underglazes, get in touch!


My Own Personal Drawing Challenge: 100 Ghosts

So as it turns out I was not ready for Drawlloween* to end on October 31st. I had a thousand more pictures in me and responding to the pressure of drawing one a day pushed me in a way I wasn’t ready to let go of. So what’s a girl to do if not make her own challenge?

This time though I can choose my own length, subject and medium. Having done mostly digital sketches for Drawlloween my Staedtler fineliner pens are calling me so an analogue drawing challenge it is.

100 ghosts drawing challenge

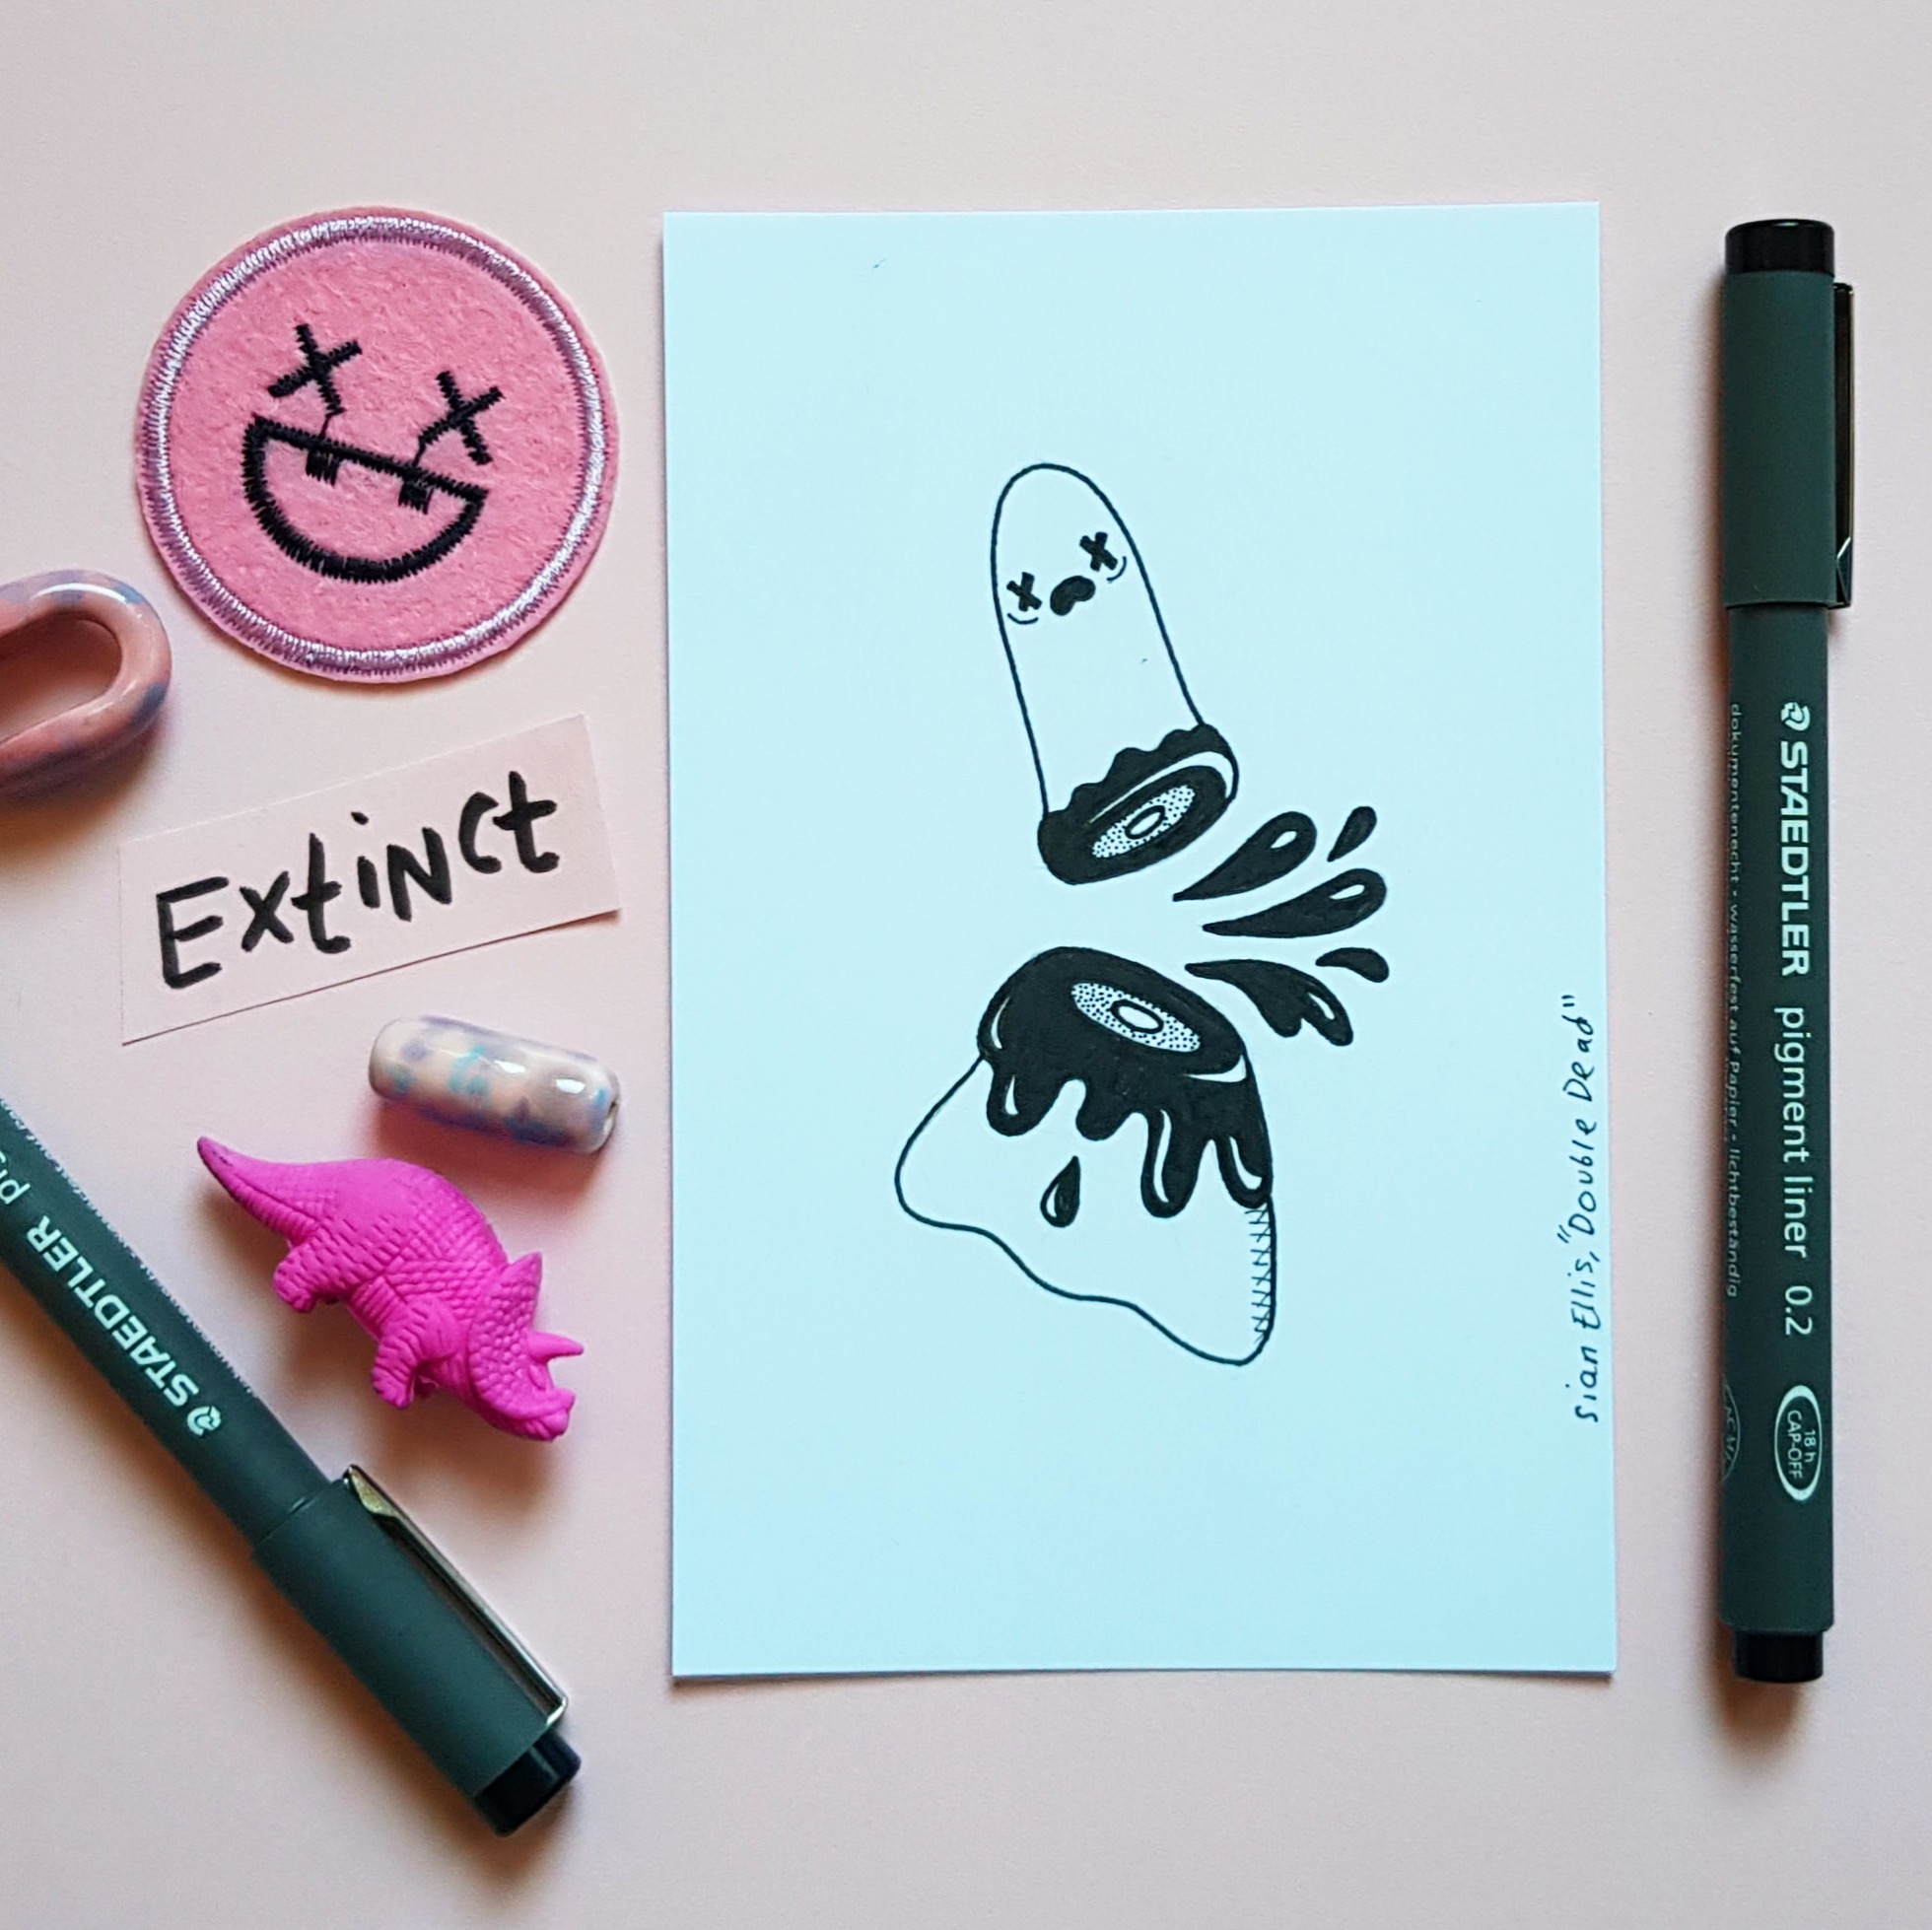
I want to explore this character a little more. I draw them a lot and they are a popular product on my etsy store as prints and patches. I am hoping that my 100 Ghosts Challenge will reveal a little bit more about their stories and personalities. Of course, I’m hoping to improve my drawing skills too, with an emphasis on shading and detail. 

100 pictures, are you mad?

Probably, yes. However, I think that this exercise in practice, production and creativity will have it’s benefits maximised by being much more than the usual 31 pictures. I feel like it’s how I need to push myself right now to improve. It’s entirely a personal thing too, I really believe that we are all different on this. I just know that for me, my gut feeling is that a long challenge will be the vehicle by which I can improve my skills, learn more about my characters and expand my creativity too. The consistency it will provide on my social media feeds is an added bonus.

If you are interested in taking this journey with me I will upload all of my 100 ghosts to my instagram feed so head on over and give me a comment to let me know what you think. I’ll also be selling some of the original sketches via my Etsy shop too 🙂

*Drawlloween is the quickest way to describe all of the drawing challenges I took part in in October.

Mural Painting at Whirlow Hall Farm, Sheffield

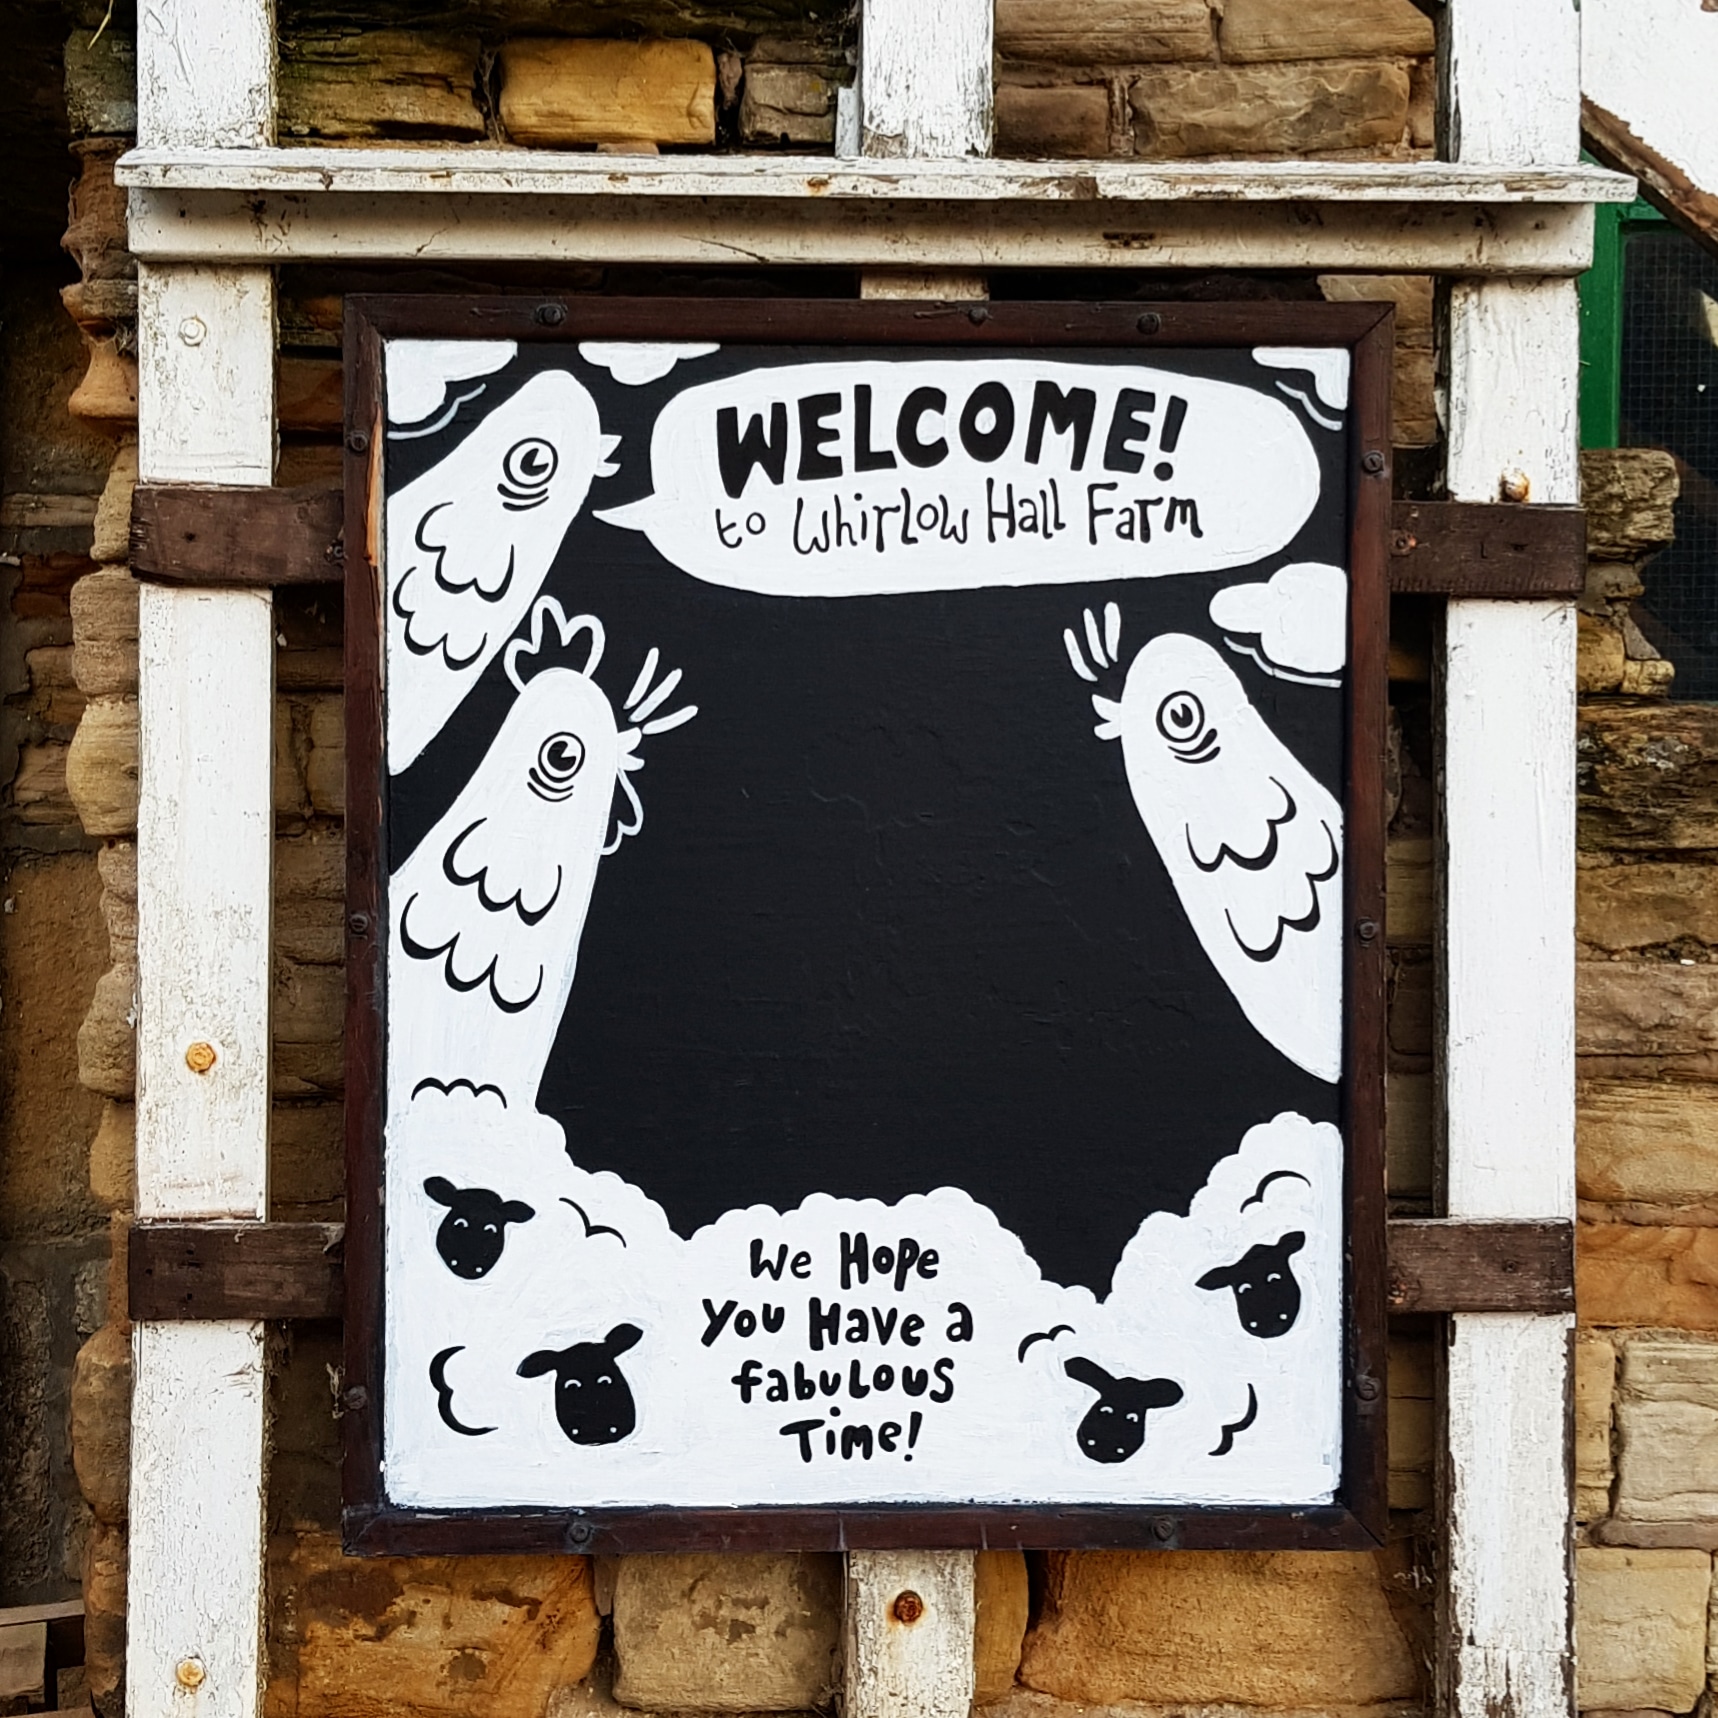
I was asked to create a mural for the Sheffield Farm to welcome school children visiting on educational trips. Luckily for me bright, bold, quirky and playful are totally my style and all very appealing to kids so it felt the perfect project to be my first large public painted piece. I would love it if more schools or businesses in Sheffield commissioned me to do mural work like this. It’s big and messy and makes me feel like a kid again!

The Process

The base layer was black paint. I started with a very basic pencil layer to indicate composition.  Next I painted the piece with emulsion paint using a digital drawing I had created as a guide. I found it important to step back every now again and check the proportions of my work. This is a necessary step in big pictures, the bigger they are the more difficult it is to control distortion. 

It took several layers of white before the piece started to look anything other than a bit of a mess. It’s important never to get disheartened if your piece looks bad at the beginning because they most often do! The benefit to the emulsion was that it dries pretty quickly so I could continously work on the piece. For the most part whilst waiting for a section to dry I could work on another, and by the time I’d finished the original section would be pretty much ready to start on again.  

To finish the piece I used posca markers. These pens are like magic and work on pretty much anything. They aren’t the cheapest but there is no comparison between official Posca pens and other more inexpensive products masquerading as similar to Poscas. Nothing I have found has come close (although please comment on this post if you wish to challenge me on this!)

If you want to know anything more about the process, leave me a comment or get in touch!

October 2018 Drawing Challenges Review- The End is Near…

This month I have been taking part in a multitude of drawing challenges. Namely the following Instagram drawing challenges for October 2018:

#mabsdrawlloweenclub2018

#seasonofthebadguysclub3

#inktober

#superradhalloweenchallenge

For those unfamiliar the challenges consist of prompts created by a variety of instagram artists of varying instafame (I think it’s fair to say that) from Inktober being the daddy of them all to #superradhalloweenchallenge seeming a shiny new and fun development.

Self styled cool kid Craig Gleason is responsible for The Season of the Bad Guys Club and every artist’s biggest girl crush Mab Graves brings the tour de force that is #mabsdrawlloween challenge. The aim is that you take a prompt for everyday of the month October and create an illustration for it that you post on your instagram using the hashtag.

It seems fitting that in the final days of this year’s challenge (also my first!) that I reflect on the last month’s work.

And the winner is…

Mab’s Drawlloween Club was the winner for me and I completed Mab’s prompts on the vast majority of the days. It’s not just that her prompts appealed to me  but also that seeing the variety of ways she responded to the prompts (yes I know that she wrote them!) was totally inspiring. Seeing her drawings, felt creations, photography and dolls blew me away and made me want to push myself too. I have also always been someone who feels an intense desire to make things out of EVERYTHING. Paper, digital, clay, textiles and even stuff destined for the bin. Mab inspired me to feature a few knitted, diorama and sculpted pieces throughout the challenges as well as pen drawings and digital art.

New challenges

Unfortunately what I also discovered was that Inktober does not seem to be for me. I only ever covered it a couple of days. In the context of the others it was just harder to get excited about. Who wants to draw something ‘tranquil’ or ‘flowing’ when there’s another prompt next door with Yokai or Cryptids? I know which one I’m going to do. But then this in itself gets me thinking for next year. Often I find myself someone who finds staying in their comfort zone the most uncomfortable thing to do. I feel like I’m taking the easy way or not challenging myself enough.

Ultimately, isn’t it most useful as a freelance illustrator to encourage ourselves to practice gleaning creativity from a prompt (or brief) that might not immediately inspire us? I for one seem to be deciding too quickly and could that mean I am missing out on inspiration and opportunities that are there, just hidden a little deeper? Part of it was also my own intention to focus on improving my digital skills which I really think I did ( check out my instagram and decide for yourself!)

It’s a commitment

One overwhelming thing that I found was that the challenges were addictive and invigorating! I had read and heard that the challenges are exhausting, as if this is some necessary evil to progress. However, despite hitting some brick walls along the way in terms of approaching prompts I always found that inspiration came and I delivered something each day. Some days I even managed to cover up to 3 prompts (and I cannot begin to tell you what a busy month it was for me outside of these challenges too, when you’re truly excited and inspired by something you can always make some time and energy for it). I would definitely recommend doing at least one of these challenges to any artist in 2019 as a way to find new artists as well as a way to practice and hone your own style too.